Friday, July 8, 2011

Making a Rag Quilt - Part Four

Sewing the Squares Together

I got my first sewing machine two years ago from Craigslist. It had an unfortunate run-in with some vintage chenille and was never the same. I donated it to a charity garage sale, and a woman named Heaven bought it. That made me laugh because that machine gave me nothing but H*&%!

My next machine was from Craigslist also, a Singer Model 384. It was a fine little machine, but it could not stand up to the rigors of rag quilting. Sewing through all the layers, especially denim on denim, requires some power. A no frills machine is fine, no computerized options are necessary, but it needs some oomph.


My second machine, on the floor next to the dog bed, awaiting a new home.
Then I got my new machine. While I still make some bone head sewing mistakes, it is so wonderful to sew without jams, skips and whining, the latter coming from me.

My new Janome HD1000!

Ready to put the rag quilt together. The first row is sewn together just as it was stacked together. Picture the whole thing laid out on the floor, that is how it will be sewn. 


The first square in your stacked first row...


...will be sewn to the edge of the next square...


 ...on down the line. You can pin these together if you like, but it's not necessary if you keep the stack in order.


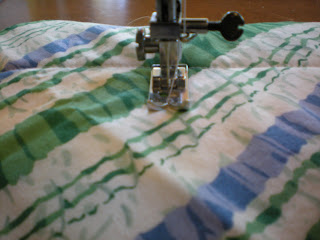
The seam allowance can be as wide as you like but definitely more than the typical 1/4" in regular sewing. Some raq quilters use a huge 1" seam allowance, but I think that looks like the tail wagging the dog. I use the far right of that hole as my guide, which is between 1/2" and 5/8".


Start sewing the squares together, the top of one to the bottom of the next.


Keep it consistent, and make sure you sewed all four layers. If they are not all even, that's OK, as long as you have all four safely in the seam.


One row done, seven more to go.


Now to sew the rows together. It will go together just like you laid it out.


You can pin the corners, but I don't. I got tired of being poked. I just line them up and adjust them before they go under the foot.


 It's a match.


 It will look horrible on the one side, that is normal.


Depending on whether I plan to sell it or not, I may or may not let this go. On a memory quilt? Well, no one was perfect. For Squared Up? Maybe I should have named my business Close Enough!


Definitely a tear out, that looks really bad! But I just tear out the corner itself, not the whole row. Then I just force it to cooperate.

Sew row 1 to 2, 3 to 4, 5 to 6 to 7. Then sew the three parts together and you are done, with the rows. But one more step.


Sew around the entire edge with a slightly larger seam allowance, it will help balance the appearance of the Xs on the side squares. Now you are done, with the sewing part at least. The next part? The dreaded snipping process.


Thursday, July 7, 2011

Making a Rag Quilt - Part Three

Design Layout, Stacking and Labeling the Rows

Here comes the fun part. Pick a nice sunny part of your house. Don't do this at night, the colors won't be true and you might have a "What was I thinking?" moment with the finished product. You don't need a huge amount of space unless your quilt is mongo sized, I just use our living room rug.


Stack the fabric squares into loose categories: stripes, solids, florals, prints, etc.


Start laying out the pattern. I rarely do a set look, what I am looking for is balance of color, pattern and light versus heavy prints and patterns. Sit back, walk away and come back to it. It can help to take a photo and look at it that way. I didn't like this, it wasn't balanced with the blue solids.


This was better. It never can get perfect, unless you use all store bought fabric, have the perfect amount of coordinating squares and have a set design. But that's not as fun as the jumbled, hodge-podge look. Once you settle on a pattern, go with it. After the quilt is made, it most likely won't be analyzed ever again.


This is the bottom left square. Take it and stack it on top of the square directly above it.


Now keep doing that all the way up the row.


What was on the bottom is now on top, the top square in on the bottom.


Do that with all the rows.


Make some number labels, and pin them to the squares in order. I have seven rows.

At this point you can either start sewing the rows together, or carefully stack them away for another time. For me, that will be tomorrow. There is no returning now, all the decisions have been made, the next process is sewing, sewing and more sewing.

Making a Rag Quilt - Part Two

Sewing the Sandwich Squares

Step two is fun, but can take a bit of time. I am an all or nothing sewer, so unless I can finish a whole process at one time, I don't start it. It does make it easier now that I have a designated sewing area, not the kitchen table, but I still don't like to have fabric all over the place.

First, do some ho-hum maintenance and sample stitches. Clean out all the fuzz blobs. Check the tension, sewing with some saved fabric and batting. I am boring with thread, I use white or cream, period. I'm sure you could get really fancy with coordinating thread that would really pop, but I stick with the basics. I use cotton covered polyester thread, but any basic thread will do. Save time, load extra bobbins now. Remember to use a fresh needle if it has been a while. When I make a memory quilt I have to switch to a denim needle.

*Update* I asked some other rag quilters on Etsy which thread they use, and they said 100% cotton Coats and Clark Machine Quilting Thread, not the cotton covered polyester I use. I use Coats and Clark also, but I was using the Hand Quilting Thread. With that endorsement, I may switch.

Then start sewing the Xs. Don't pull, don't push, let the sewing machine do the work. It wants to sew straight, just guide the fabric. With rag quilts it is wrong side to wrong side, probably not how you learned from your Mom or from sewing class. Sew from corner to corner, getting as close as you can, but perfection is not necessary.
You don't need to finish both sides of the Xs at once. You can "daisy chain" square after square, just sewing the first part of the X. You can do this in batches of 10, 20 or as many squares as you like, building up a pile of them behind the machine. When you finish as many as you like, trim the thread between the squares and re-stack them for the next part of the X.
Now sew the rest of the X, daisy chaining as you go. If it looks crooked, or the stitch tension is getting wacky, decide how much it will show on the finished quilt. The lighter and busier the fabric, the less your boo-boos will show. Mistakes show up the most on vibrant and dark fabrics.
If you have any goofies, squares with 2 different fabrics front and back, put a pin in them now so you won't forget when you are deciding on your layout.

When you are done, you can bag or box up the squares for another time, day, month, year. By now I am usually shocked at the time and the house is needing some TLC. I clean up all the threads on the floor, put my tools away, reintroduce myself to my husband and dog, rehydrate and STRETCH.

Next step will be the layout, my very favorite part of this whole process.

Wednesday, July 6, 2011

Making a Rag Quilt - Part One

Selecting and Cutting Out the Fabric

The heatwave broke tonight, and the wonderful Delta breezes came blowing in. It got me out of my heat funk and I decided to start another quilt. Once again, I failed to time the first process, so when people ask me how long it takes to make a rag quilt, the answer will have to remain, a very long time!

While these are by no means technical instructions, here is my method:

Gather your tools. A cutting mat, a rotary cutter, scissors and a template.

I didn't have a cutting mat or a rotary cutter on my first quilt, they are not necessary, but wow it speeds up the process and makes nice neat edges. Buy the largest mat you can afford, they seem to shrink the minute you bring them home. The messed up, taped up template is the one that was given to me, the nice one is my neighbor's. These can be purchased at a fabric store.
Start gathering fabric that you think might look good together. Don't sweat it, this is not rocket science, it is just a quilt. These are from all over, the thrift store, garage sales, there is even a Hawaiian shirt in there and a skirt that always made me feel huge. If it is cotton, it is fair game. These are going to look adorable, but not now, maybe in the fall when people are more drawn to warm and cozy colors.
This is what I hit on for this quilt. Lots of cool blues, greens and whites, with an adorable nautical theme. I really don't know how it will look at the end, that is what is so fun about this, but the fabrics are telling me cool, soothing and a touch of cuteness, a shabby cottage beachy look. I got these at the thrift store, a garage sale and from a former co-worker who quilts. There is some really cool Laura Ashley in here, plus some of unknown heritage. It is all cotton, that is what matters.
Cut out the squares, the neater the better, but perfection is not necessary. Place a smaller square of Warm and White Cotton Batting in the middle of the "sandwich." If you are using warm colors, you can use Warm and Natural Cotton Batting. Don't use any other material. This is the most expensive part of the quilt, which stinks because it doesn't even show. But the cheaper kind just doesn't cut it. Wait until it goes on sale. Put the batting in between now, this will save you a step later when you sew the sandwiches together.
 Give your trusty assistant some scraps now and then.
The front and back do not need to match, but be aware you have a goofy one when you lay out your pattern, so as not to put two matching squares next to each other. You can keep track of the goofies by putting a quilt pin through them.
Make a few extra squares in case you have some sewing disasters. I made 51 for a 49 square quilt. This quilt will be 7 rows by 7 rows, a square. About the biggest I make is 80, 8 rows by 10. My baby quilts are 5 by 5, or 5 by 7 for crib size.
This is the part that will make it a beach themed quilt. This is the Laura Ashley fabric I got at the thrift store on the right, the whale fabric on the left is from a garage sale.

But now, I put it aside and rest my hands. The next process can wait. I have a feeling this is going to be a really cute one!


Fiskars 95217097 45 mm Rotary Cutter
OLFA 9881 RM-SG 18" x 24" Self-Healing Double-Sided Rotary Mat
Olfa Deluxe Rotary Cutter (60mm)

A Massage followed by Vegan Chocolate Pudding

Last night I visited the Myra Recommended Five Thumbs Up Place of Joy, the foot massage place. Myra had made the reservations, and she did all the talking. It was so very, very lovely. It was cool, dark and quiet. There was soothing music. It was a big room full of massage chairs, but the only place that mattered was the part of my body that was being worked on. It is called foot massage, but they do feet and all parts north. It is only $20. FOR AN HOUR!!! Plus a tip, but at that point you're ready to just hand them your wallet.

Foot Reflexology Expert
5942 Stockton Boulevard
Sacramento CA 95824
916.393.1183

That is the address. Go, just go.

I still had errands to run after the massage and was not happy to have all the peace and serenity leaving my body in the 102 degree weather. I came home to a clean kitchen, but one stacked with lots of washed bowls and pans. Hmm, what was Ernst up to? I opened the fridge. There were lots of little cups. They were filled with chocolate joy. Ernst made Vegan Chocolate Pudding, and did a bang up job of cleaning it up to boot. A massage of joy followed by chocolate joy? What a way to end a busy hot Tuesday.


Vegan Chocolate Pudding

One package chocolate chips, we use vegan
1-2 packages silken Tofu
a dash of vanilla
a few globs of maple syrup
the tiniest pinch of salt

Melt the chips in a double boiler or in the microwave. Place the tofu in a blender. If you like tofu, add more. If you hate tofu, try it anyway with less. Pour in the chocolate, vanilla and maple syrup. Whip it up. Pour into small serving containers, it is rich. Cover and refrigerate. Easy sneazy. (Ernst is famous for using every bowl in the house, but you should just end up with a blender, the chocolate melting container and a scraper that need washing.)

This is a cholesterol free dessert, but it is not fat free. For the McDougall diet, this is a treat, not an everyday event.

That is the recipe. Try it, just try it.


Tuesday, July 5, 2011

The Simba Quilt

This little baby quilt was made from flannel receiving blankets from the thrift store. They were all there together, matching and coordinating themselves without me having to think about it. Like when you see a skirt at the thrift store, and there is the perfect blouse there too, donated by the same person at the same time. That is thrift store shopping at its best.
This is a commissioned quilt for an upcoming baby shower. I named it Simba after the Lion King, since two of the fabrics are adorable safari animal prints. Nine months too late for Elliot, but it would have been too small for him after a few weeks anyway!


Friday, July 1, 2011

A Memory Quilt


My friend Jil is a RLTFWHMLW, Really Long Time Friend Who Has Made Life Wonderful. In many ways we are different, but I cannot imagine having navigated through the last 28 or so years without her.

She and her husband lost his mom recently, and I made them this memory quilt. It was a challenge for two reasons. First, the clothes that Ed's mom wore were mostly knits. They don't do well in rag quilts, they don't fray. I had to use some t-shirt materials along with the cotton I did find, and they are a bear to sew with. They S-T-R-E-T-C-H and wow I had some off kilter squares.

Second, she was a tiny woman. I had a time of it trying to get quilt squares out of her very little petite sized clothes. But as usual, a memory quilt goes together really nicely because the colors are what people actually wore together, and it all comes out looking good together. Along with the clothes, I used a cotton tablecloth that pulled it all together.


Remember Jil, I'm always five weeks to the day younger!